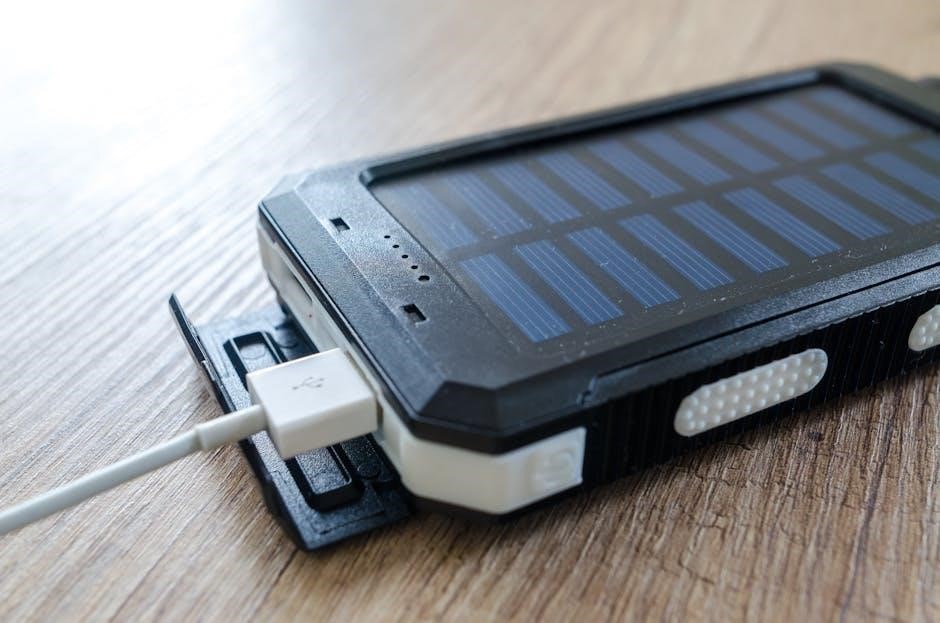
The Black and Decker Smart Battery Charger is a fully automatic, high-frequency charger designed for efficient and safe charging of 12-volt batteries, including AGM, GEL, and WET types.
1.1 Purpose of the Instruction Manual
The purpose of this instruction manual is to provide users with a comprehensive guide for the safe and effective use of the Black and Decker Smart Battery Charger. It outlines essential safety precautions, operating instructions, and maintenance tips to ensure optimal performance. The manual also covers troubleshooting common issues and understanding warranty details. By following the guidelines, users can maximize the charger’s efficiency and extend the life of their batteries. This manual is designed to be user-friendly, offering clear instructions for both novice and experienced users. Proper adherence to the manual will help prevent accidents and ensure the charger functions as intended. Always refer to this guide before operating the charger for the first time.
1;2 Overview of the Smart Battery Charger
The Black and Decker Smart Battery Charger is a fully automatic electronic device designed for efficient and safe charging of 12-volt batteries. It supports AGM, GEL, and WET battery types, making it versatile for automotive, marine, and other applications; The charger features multiple charge rates (40/20/10/4 Amp) and a 10 Amp engine start function for quick boosts. Its high-frequency smart technology ensures optimal charging performance by sensing baseline voltage. The unit is designed to prevent overcharging and includes safety protections to minimize risks. With its user-friendly interface and robust design, the Smart Battery Charger is ideal for both novice and experienced users. The manual is available online as a PDF for easy access to detailed instructions and troubleshooting guides.

Safety Precautions and Warnings
Always wear safety goggles and ensure good ventilation when charging batteries. Avoid overcharging and keep flammable materials away. Follow all safety guidelines to prevent accidents.
2.1 General Safety Instructions
Always wear protective gloves and safety goggles when handling batteries and the charger to prevent injury from acid spills or electrical sparks. Ensure the charging area is well-ventilated, away from flammable materials, and out of reach of children. Avoid overcharging, as it can cause battery damage or overheating. Never touch electrical connections with wet hands or while standing in water. Use the charger only in temperatures between 32°F (0°C) and 104°F (40°C). Keep the charger and cables away from direct sunlight or heat sources. Follow the manufacturer’s instructions for proper connections to avoid short circuits. Regularly inspect the charger and cables for damage before use.
Do not modify or tamper with the charger’s internal components, as this can lead to malfunction or safety hazards. If unsure about any procedure, consult the manual or contact a professional. Always unplug the charger before servicing or storing it. Ensure the battery is placed on a stable, non-conductive surface during charging. Avoid smoking or using open flames nearby. Keep emergency contact numbers handy in case of accidents. Adhere to all local safety regulations and guidelines when operating the charger.
2.2 Hazards Associated with Lead-Acid Batteries
Lead-acid batteries contain sulfuric acid, which is highly corrosive and can cause severe burns. Avoid skin or eye contact, as it may lead to permanent damage. In case of exposure, flush with water and seek medical attention immediately. Battery acid can also damage surfaces and clothing. Hydrogen gas produced during charging is explosive in enclosed spaces. Ensure proper ventilation to prevent gas buildup. Never inhale acid fumes or hydrogen gas, as they are harmful to health. Use protective eyewear and gloves when handling batteries. Improper disposal of lead-acid batteries can harm the environment, so follow local regulations for safe recycling. Always keep batteries out of reach of children and pets.
2.3 Explosive Gas Risks
When charging lead-acid batteries, hydrogen gas is produced, which is highly flammable and explosive in enclosed spaces. Never charge batteries in poorly ventilated areas, as gas accumulation can lead to dangerous situations. Keep open flames, sparks, or hot surfaces away from the charging area. Overcharging increases gas production, raising the risk of explosion. Always monitor the charging process and avoid leaving the charger unattended. Ensure the charger is placed in a well-ventilated space, away from living areas. If you suspect gas buildup, stop charging immediately and ventilate the area. Smoking near the charger or battery is strictly prohibited, as it poses a significant fire hazard. Always prioritize ventilation and caution to prevent accidents.

Features of the Black and Decker Smart Battery Charger
The charger offers fully automatic electronic charging, multi-amp charge rates (40/20/10/4 Amp), a 10 Amp engine start function, and compatibility with AGM, GEL, and WET batteries.
3.1 Fully Automatic Electronic Charging
The Black and Decker Smart Battery Charger features fully automatic electronic charging, designed to simplify the charging process. This advanced system automatically detects the battery’s charge level and selects the appropriate charging mode, ensuring optimal performance without manual intervention. The charger intelligently adjusts the charging current to prevent overcharging, which can damage the battery. It also includes safety features like spark-proof technology and reverse polarity protection. This automatic functionality makes it user-friendly, reducing the risk of errors and ensuring a safe, efficient charging experience for various battery types. The charger’s intelligent design ensures batteries are charged to their full capacity while maintaining their health and longevity.
3.2 Multi-Amp Charge Rates (40/20/10/4 Amp)
The Black and Decker Smart Battery Charger offers versatile charging with its multi-amp charge rates, providing 40/20/10/4 Amp options. This flexibility allows users to choose the ideal current for their specific needs, ensuring efficient charging for various battery types and sizes. The 40 Amp setting is perfect for large batteries in vehicles, while the 20 Amp is suitable for standard automotive use. The 10 Amp mode is designed for smaller batteries, such as those in motorcycles or lawn mowers, and the 4 Amp setting is optimal for maintaining batteries or charging smaller capacity units. This range ensures that users can tailor the charging process to their exact requirements, enhancing both safety and efficiency. The charger automatically adjusts to the selected current, making it adaptable for different applications.
3.3 10 Amp Engine Start Function
The Black and Decker Smart Battery Charger features a 10 Amp Engine Start Function, designed to provide a high-current burst for emergency starting of vehicles with discharged batteries. This function allows users to jump-start engines without fully charging the battery, saving time and effort. The charger delivers a powerful 10 Amp surge to turn over the engine, even when the battery voltage is low. Safety features ensure the process is secure, with automatic shut-off to prevent over-discharge or damage. This function is particularly useful for drivers who need a quick solution to get back on the road. It is compatible with a wide range of vehicles, making it a versatile and reliable tool for unexpected situations. The Engine Start Function enhances the charger’s practicality for everyday use.
3.4 Compatibility with AGM, GEL, and WET Batteries
The Black and Decker Smart Battery Charger is designed to work seamlessly with various types of batteries, including Absorbent Glass Mat (AGM), Gel, and Wet (Flooded) batteries. This versatility makes it a convenient option for users with different battery needs. The charger automatically detects the battery type and adjusts its charging parameters accordingly, ensuring optimal performance and safety. AGM and Gel batteries benefit from precise charging to prevent damage, while Wet batteries receive a robust charge to maintain their health. This compatibility ensures the charger is suitable for a wide range of applications, from cars and trucks to marine and recreational vehicles. The charger’s adaptability minimizes the need for multiple charging units, making it a practical and efficient solution for various battery types. Its advanced technology ensures reliable charging across all compatible batteries.

Installation and Setup
Ensure the charger is placed in a well-ventilated area and on a stable surface. Follow the manual’s guidelines for proper electrical connections and setup to ensure safe operation;
4.1 Choosing the Right Location for the Charger
When selecting a location for your Black and Decker Smart Battery Charger, ensure it is placed in a well-ventilated area to prevent the accumulation of explosive gases. Choose a stable, flat surface away from direct sunlight and moisture. Avoid areas with flammable materials or extreme temperatures. The charger should be positioned in a location that is convenient for access but out of the way of foot traffic. Ensure the charger is at least 12 inches away from any walls or obstructions to allow proper airflow. This setup will help ensure safe and efficient charging operations.
4.2 Electrical Connection Requirements
Ensure the Black and Decker Smart Battery Charger is connected to a properly grounded 120V AC electrical outlet. Use the provided power cord and avoid damaged or frayed cords to prevent electrical hazards. If an extension cord is necessary, choose one rated for the charger’s power requirements and keep it away from heat sources. Do not overload circuits, and ensure the outlet is not shared with high-power appliances. The charger is designed for use on 120V AC, 60Hz power systems; using it in environments with different voltage or frequency may cause malfunction. Always follow local electrical codes and safety standards to ensure safe operation.
Charging Instructions
The Black and Decker Smart Battery Charger offers easy, safe, and efficient charging. Follow the step-by-step guide to ensure proper connection, selection of charge rates, and monitoring for optimal results.
5.1 Preparing the Battery for Charging
Before charging, ensure the battery is in a well-ventilated area to prevent gas buildup. Disconnect the negative terminal first to avoid sparks. Check terminals for corrosion and clean with baking soda and water, wearing protective gear. Dry thoroughly before connecting the charger. Choose the correct charger mode for your battery type (AGM, GEL, or WET). Check the battery’s state of charge; if dead, use the 10 Amp Engine Start function. Select the appropriate charge rate (40, 20, 10, or 4 amps) based on the battery’s capacity. Avoid charging near open flames and monitor charging time to prevent overcharging.
5.2 Connecting the Charger to the Battery
Connect the charger to the battery by attaching the positive (red) clamp to the positive terminal and the negative (black) clamp to the negative terminal. Ensure the charger is turned off before making connections to avoid sparks. Verify the charger is set to the correct battery type (AGM, GEL, or WET). Plug the charger into a grounded electrical outlet and check for proper connection. The LED indicators will light up to confirm the charger is operational. Avoid over-tightening clamps, as this may damage terminals. If the battery is deeply discharged, use the 10 Amp Engine Start function to revive it before charging. Always follow polarity guidelines to prevent damage or risk of explosion.
5.3 Selecting the Appropriate Charge Rate
Selecting the correct charge rate is crucial for optimal charging and battery longevity. The Black and Decker Smart Battery Charger offers multi-amp charge rates (40/20/10/4 Amp) to suit various battery sizes and types. For large batteries or deep cycle applications, use the 40 Amp rate. The 20 Amp rate is ideal for standard automotive batteries, while the 10 Amp rate is suitable for smaller batteries or maintenance charging. The 4 Amp rate is designed for long-term maintenance and preserving battery health. Always match the charge rate to the battery’s capacity and type (AGM, GEL, or WET) to ensure safe and efficient charging. Refer to the manual for specific recommendations based on your battery type and needs.
5.4 Starting the Charging Process
Once the charger is connected to the battery and the appropriate charge rate is selected, press the Start button to begin charging. The charger will automatically detect the battery type and initiate the charging cycle. Ensure the charger is plugged into a suitable electrical outlet and the battery terminals are secure. The charger’s LCD display will show the charging progress, voltage, and current. Allow the charger to operate without interruption until the cycle is complete. If the charger detects any issues, it will pause and display an error code. Always refer to the manual for troubleshooting guidance if an error occurs during the charging process.
5.5 Monitoring the Charging Progress
Monitor the charging progress using the charger’s LCD display, which provides real-time updates on voltage, current, and charging percentage. The display will also indicate the estimated time remaining until the battery is fully charged. Pay attention to the visual indicators, such as progress bars or LED lights, which show the charging status. Once the battery reaches 100% charge, the charger will automatically switch to maintenance mode to prevent overcharging. Avoid interrupting the charging process until it is complete. Periodically check the connections to ensure they remain secure and clean. If any unusual behavior is observed, such as erratic display readings or unexpected noises, stop the process and consult the troubleshooting section.
5.6 Stopping the Charging Cycle
To stop the charging cycle, first ensure the charger is turned off using the power button. Disconnect the charger from the battery by removing the clamps from the terminals. If the charger is connected to a power source, unplug it from the electrical outlet. The LCD display will confirm the charging cycle has been interrupted. If the charger is in maintenance mode, it will automatically stop when disconnected. Always check the display for any error messages before stopping. Store the charger and battery in a cool, dry place after use. Refer to the troubleshooting section if the charger does not respond to the stop command. Properly stopping the cycle helps maintain battery health and charger functionality.

Maintenance and Care
Regularly clean the charger with a soft cloth and store it in a dry, cool place. Avoid extreme temperatures and moisture exposure to ensure longevity. Check cables for damage before use to prevent malfunctions and ensure safe operation. Always follow the manufacturer’s guidelines for proper maintenance to keep the charger functioning optimally. Proper care extends the lifespan of the Black and Decker Smart Battery Charger and ensures reliable performance over time. Keep the unit away from flammable materials and children to maintain safety standards. Regular inspections and timely repairs are essential for maintaining efficiency and safety. Always refer to the manual for specific care instructions. Maintain the charger properly to ensure consistent and safe battery charging experiences. Protect the device from dust and debris to preserve its electronic components. Schedule periodic checks to identify and address potential issues early. Store the charger in its original packaging when not in use to prevent accidental damage. Avoid overloading or stressing the cables, as this can lead to permanent damage. Keep the charging area well-ventilated to prevent overheating. Regularly update the charger’s software if applicable to ensure optimal functionality. Use only approved accessories to maintain compatibility and safety. Clean the battery terminals before charging to ensure proper connectivity. Avoid exposing the charger to direct sunlight for extended periods. Inspect the power cord for frays or cracks and replace it if necessary. Never submerge the charger in water or use it in humid environments. Follow the recommended charging cycles to prevent overcharging and battery degradation. Ensure the charger is turned off when not in use to conserve energy and reduce wear. Check for firmware updates periodically to enhance performance and security. Always unplug the charger during extended storage to prevent electrical issues. Keep the charger away from pets and children to avoid accidental damage or hazards. Clean the charger’s ventilation slots to maintain proper airflow and prevent overheating; Use a dry, non-abrasive cloth to wipe down the exterior and prevent corrosion. Avoid using harsh chemicals or abrasive cleaners, as they may damage the surface. Ensure all connections are secure before charging to prevent loose contacts. Store the charger in an upright position to avoid liquid spills or leaks. Regularly inspect the clamps for tightness and cleanliness to ensure proper battery connections. Avoid bending or twisting the cables excessively, as this can cause internal damage. Keep the charger away from magnetic fields to prevent interference with its electronic components. Always follow the manufacturer’s maintenance schedule for optimal performance. Proper care ensures the charger remains efficient and safe for extended use. Regular maintenance helps prevent unexpected failures and ensures reliable battery charging. Keep the charger’s components free from dust and debris for consistent operation. Avoid overcharging batteries, as this can reduce their lifespan and cause potential hazards. Store the charger and cables neatly to prevent tangles and damage. Use the charger only for its intended purpose and compatible battery types. Regularly check the charger’s error codes and address them promptly to maintain functionality. Keep the charger’s manual accessible for quick reference during maintenance and troubleshooting. Always prioritize safety when handling the charger and batteries to prevent accidents. Regular maintenance ensures the charger operates efficiently and safely, prolonging its lifespan. Clean the charger’s display screen gently to maintain visibility and responsiveness. Avoid touching the electrical components to prevent static discharge damage. Store the charger in a protective case when transporting it to prevent scratches and damage. Always ensure the charger is cool before storing it to prevent heat-related issues. Check the charger’s warranty for any maintenance-related coverage or recommendations. Regularly test the charger with a fully charged battery to ensure proper function. Keep the charger updated with the latest software to enhance performance and compatibility. Avoid using the charger near open flames or sparks to reduce fire hazards. Regular inspections help identify worn-out parts that may need replacement. Store the charger in a well-ventilated area to prevent the buildup of explosive gases. Always follow the manufacturer’s guidelines for disposal and recycling of the charger and batteries. Proper maintenance ensures the charger remains a reliable tool for all your battery charging needs. Regular care and attention will extend the life of the Black and Decker Smart Battery Charger. Maintain the charger according to the manual to ensure safety and optimal performance.
6.1 Cleaning and Storage Tips
Regularly clean the Black and Decker Smart Battery Charger with a soft, dry cloth to remove dust and dirt. Avoid using harsh chemicals or abrasive materials, as they may damage the surface. Store the charger in a cool, dry place away from direct sunlight and moisture. Ensure the unit is turned off and unplugged before cleaning. Keep the charger away from children and pets to prevent accidental damage. For storage, place the charger in its original box or a protective case to avoid scratches. Avoid exposing the charger to extreme temperatures or humidity, as this can affect its performance. Clean the clamps and terminals with a wire brush to ensure good connectivity. Always store the charger upright to prevent liquid spills or leaks. Check for firmware updates before long-term storage to ensure optimal functionality upon reuse. Proper cleaning and storage will extend the lifespan and maintain the efficiency of the Black and Decker Smart Battery Charger.
6.2 Checking for Wear and Tear
Regularly inspect the Black and Decker Smart Battery Charger for signs of wear and tear to ensure safe and efficient operation. Check the power cord for any fraying, cuts, or damage. Inspect the clamps and cables for corrosion or damage, as this can affect charging performance. Look for any cracks or dents on the unit’s casing, which may indicate physical stress; Avoid using the charger if you notice any damage to the electrical components. Clean the terminals with a wire brush to remove corrosion. Ensure all connections are secure and tighten any loose clamps. Regularly checking for wear and tear helps prevent accidents and maintains the charger’s effectiveness. Replace any damaged parts promptly to ensure optimal performance and safety.

Troubleshooting Common Issues
Troubleshoot common issues by identifying symptoms, checking connections, and referring to error codes. Ensure the charger is properly connected and the battery is compatible. Consult specific sections for detailed solutions to ensure safe and effective charging.
7.1 Battery Not Charging
If the battery is not charging, first ensure all connections are secure and free from corrosion. Verify the charger is properly plugged into a working electrical outlet. Check that the correct charge rate (40/20/10/4 Amp) is selected for the battery type. Confirm the battery is compatible with the charger (AGM, GEL, or WET). If using the 10 Amp engine start function, ensure it is only activated for emergency starting. Allow the charger to complete its diagnostic cycle before assuming a malfunction. If issues persist, consult the error codes section or contact customer support for assistance. Always refer to the manual for specific troubleshooting steps.
7.2 Charger Not Turning On
If the Black and Decker Smart Battery Charger fails to turn on, first verify that it is properly plugged into a working electrical outlet. Ensure the outlet is functioning by testing it with another device. Check the power cord for any visible damage or frays and confirm it is securely connected to both the charger and the outlet. If the charger has a power button, ensure it is pressed and functioning correctly. Some models may enter standby mode; press and hold the button to activate it. If the issue persists, check your home’s circuit breaker or fuse box to ensure no circuits have tripped or fuses blown. Consult the manual or contact customer support for further assistance.
7.3 Error Codes and Solutions
The Black and Decker Smart Battery Charger displays error codes to indicate specific issues. If you encounter an error code, refer to the following solutions:
– E1: Battery connection issue. Check terminals for cleanliness and ensure secure connections.
– E2: Overvoltage detected. Verify battery voltage is within the charger’s acceptable range.
– E3: Overheating detected. Ensure proper ventilation and allow the charger to cool.
– E4: System malfunction. Unplug, wait 30 seconds, and plug back in. If the issue persists, contact customer support.
Always address error codes promptly to avoid further complications. For detailed troubleshooting, consult the user manual or visit the official Black and Decker support website for additional resources. Properly resolving these issues ensures safe and efficient charging.
Battery Reconditioning
Battery reconditioning restores lost capacity in aged batteries. The charger’s reconditioning mode equalizes cells, reversing sulfation. Regular use extends battery life and improves performance effectively.
8.1 Understanding the Reconditioning Cycle
The reconditioning cycle is a specialized maintenance function designed to extend battery life. It works by applying a controlled electrical charge to reverse sulfation, a common issue in lead-acid batteries. During this process, the charger sends pulses to break down sulfate crystals that form on battery plates, restoring capacity and improving performance. The cycle is typically longer than a standard charge and should be performed periodically, especially for batteries in storage or showing signs of aging. Regular reconditioning helps prevent premature battery failure and ensures optimal functionality over time. Always follow the charger’s guidelines for reconditioning to avoid overcharging or damage.
8.2 Steps to Recondition a Battery
To recondition a battery using the Black and Decker Smart Battery Charger, start by ensuring the battery is charged to at least 12 volts. Connect the battery to the charger using the provided clamps, ensuring a secure connection to the positive and negative terminals. Select the reconditioning mode, typically marked by a specific button or setting on the charger. Allow the charger to run the reconditioning cycle, which may take several hours, as it applies controlled pulses to restore battery health. Once complete, check the battery voltage and perform a load test to ensure proper function. Repeat the process if necessary and store the battery in a cool, dry place to maintain its condition. Regular reconditioning helps extend battery life and improve performance.

Warranty Information
The Black and Decker Smart Battery Charger is backed by a limited warranty covering defects in material and workmanship for a specified period, typically two years from purchase date.
9.1 Warranty Coverage Details
The Black and Decker Smart Battery Charger is covered by a 2-year limited warranty starting from the date of purchase. This warranty applies to defects in materials and workmanship under normal use and conditions. During this period, Black and Decker will repair or replace the charger free of charge if it fails due to manufacturing defects. The warranty requires proof of purchase for validation. Coverage excludes damage caused by misuse, neglect, or unauthorized modifications. Batteries charged by the device are not included in this warranty. For full details, refer to the warranty certificate provided with the product or contact Black and Decker customer support.
9.2 Exclusions and Limitations
The warranty does not cover damage resulting from misuse, abuse, or improper installation of the Black and Decker Smart Battery Charger. Normal wear and tear, such as cord abrasion or terminal corrosion, are excluded. Unauthorized modifications or repairs made by non-authorized personnel void the warranty. Damage caused by using non-genuine Black and Decker parts or accessories is also not covered. The warranty does not extend to consequential damages, such as loss of time or battery failure due to improper charging. For full details on exclusions, refer to the warranty document provided with the product or contact Black and Decker customer service for clarification.
By following this manual, you can ensure safe and optimal use of the Black and Decker Smart Battery Charger, maximizing its performance and longevity effectively.
10.1 Final Tips for Optimal Use
To maximize the performance and lifespan of your Black and Decker Smart Battery Charger, always follow the recommended charge rates and monitor the charging process. Regularly inspect the battery terminals for corrosion and clean them if necessary. Store the charger in a cool, dry place when not in use to prevent damage. Avoid overcharging, as this can reduce battery longevity. For vehicles with deep-cycle batteries, use the reconditioning mode periodically to maintain health. Ensure the charger is placed on a stable, non-flammable surface during operation. Refer to the manual for specific guidelines when charging different battery types. By adhering to these tips, you can ensure reliable and efficient charging for years to come.
10.2 Importance of Following the Manual
Adhering to the Black and Decker Smart Battery Charger manual is essential for safe and effective operation. The guidelines provided ensure proper charging techniques, preventing potential damage to the battery or charger. Misuse can lead to safety hazards, such as explosions or electrical fires. By following the manual, users can optimize battery performance, extending its lifespan. The instructions also help prevent voiding the warranty and ensure compliance with safety standards. Always refer to the manual for specific charging requirements, especially for different battery types like AGM, GEL, or WET. Proper adherence guarantees reliable performance and protects both the user and the equipment from harm.